My Biggest Problem With the eufyMake E1 (and How to Fix It)
The E1's snapshot camera is accurate in the center of the bed and increasingly wrong toward the edges. For one centered phone case that's fine. For a bed full of parts, at $430 a liter of ink, it's the problem worth fixing properly.
Contents
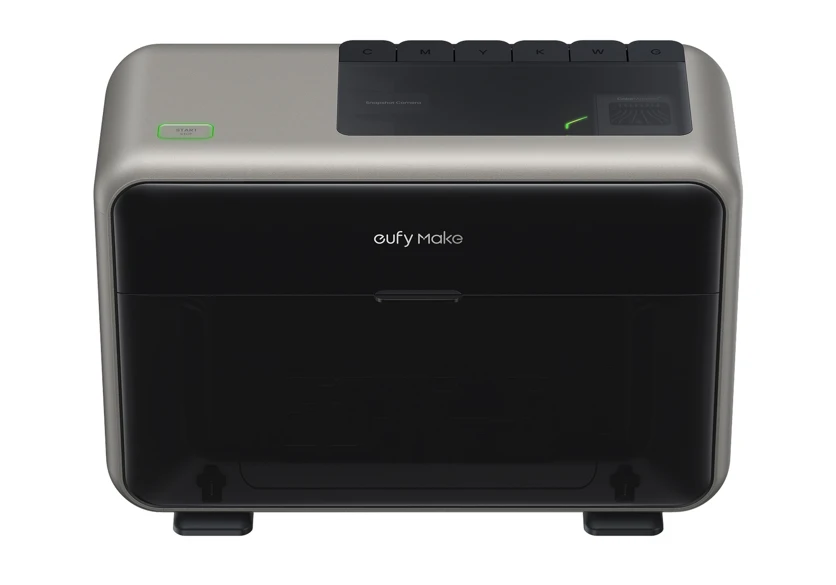
You lined everything up perfectly on screen. Then the print landed a millimeter or two off, and a good blank went to scrap. If you've run the eufyMake E1 near the edges of its bed, you know the feeling, and it's not your hands: it's the camera. Photo Alignment, the snapshot you drag your artwork onto in eufyMake Studio, is spot-on in the middle of the bed and drifts the further out you go. eufyMake says as much themselves: "Alignment can drift as you move toward the edges because of natural lens distortion." The fix costs nothing you don't already own: Zero Point Alignment, in Studio since March 2026, plus a jig. And a free browser tool now builds the jig for you.
One camera, a whole bed of parallax
The E1 positions prints by photographing its own bed. Press Snapshot and the 8 MP camera takes a picture of the platform. Studio flattens that photo into a top-down view, and you drop your design onto the picture of your part. For a phone case in the middle of the bed, it works so well you stop thinking about it. The trouble is geometry: one camera, one lens, and a bed that runs well past the sweet spot underneath it. Put simply, the further a part sits from the center, the more the flattened photo fibs about where it really is.
Owners describe it more vividly than the manual does. "The skew radiates from the camera's pole," wrote one, after test printing the same layout 5 to 10 times to get every element placed. Another, printing golf balls spaced across the bed: "align once from the center of the bed (only place the camera's accurate) and then move copies out from the center. Takes courage to hit Print even when things don't look aligned in the camera."
Two different faults hide under the same symptom, and they have different fixes:
| Symptom | What it is | The fix |
|---|---|---|
| Everything prints offset by the same amount, even centered | Calibration drift | Run Camera Calibration (about 5 min mini platform, 10 min standard); one owner cleared a 3 mm offset this way |
| Accuracy degrades toward the bed edges | Lens distortion, inherent to the single-camera design | Stop positioning by photo: Zero Point Alignment plus a jig |
Camera Calibration 'relearns positional data and compensates for physical deviations' per eufyMake's guide, and their stated trigger is 'noticeable overall offset'. It does not remove edge distortion: eufyMake's own printing guide says the camera 'is most accurate' at the center and recommends a jig near the edges. All docs fetched July 8, 2026.
eufyMake doesn't publish an XY placement accuracy figure for the camera (as of July 8, 2026), so the honest spec is the owners' reports: fine in the center, 1 to 3 mm adrift at the edges, varying by unit and calibration state.
What a misaligned bed actually costs
On most printers a misplaced print costs a shrug. On the E1 it costs ink, and this machine has the priciest ink in its class: $42.99 per 100 ml, about $430 a liter (as of July 8, 2026). That bill is why every challenger shipping this year is aimed straight at the E1's running cost. It also costs the blank underneath, which for engraved metal cards or finished goods is often worth more than the ink. And it costs time the spec sheet never shows. The camera adds about 2 minutes of capture before each print. A failed layout means re-photographing the whole bed. And the workaround owners recommend most, printing a sacrificial outline of your parts first and setting the real ones on it, "adds an extra 15+ minutes usually" in the words of the owner who swears by it.
Batch work multiplies all of it. One owner filled the bed with 42 coins and reported the outer ones landing 1 to 2 mm off. A misaligned single print is an annoyance; a misaligned full bed is 42 defects that share one cause.
What owners do about it
Owners have worked out a handful of fixes, roughly in order of popularity:
- Keep everything in the center. Works, and wastes most of a 330 x 420 mm bed you paid $2,499 (2,499 EUR) for.
- Print an outline first. A one-layer print of your layout on paper, tape or transfer film, then place the real parts on the printed marks. The most recommended fix, and the 15+ minute one.
- Oversize the artwork. eufyMake's own advice: "slightly extend your design beyond the actual object size" so small shifts don't leave unprinted edges. Fine for full-wrap graphics, useless for bordered designs.
- Recalibrate, sometimes creatively. One owner fixed a 3 mm global offset by re-running Camera Calibration on plain card stock instead of the provided sheet. Worth trying before anything else; it won't touch the edge drift.
- Buy or build a jig. A cottage industry has formed here: a Kickstarter for a bed-wide alignment plate (the Wham Bam ULTIM8 JIG, 5 mm holes on a 10 mm grid), corner and origin-reference jigs on MakerWorld, a much-upvoted $9 silicone-mat recipe. When a Kickstarter exists to fix your camera, the problem is real.
The fix that scales: Zero Point Alignment plus a jig
In March 2026, eufyMake shipped the feature that makes the camera optional. Zero Point Alignment, in their words, "allows users to print directly on regular geometric shapes... without going through the photo/snapshot alignment step." You calibrate the mat's zero point once, place the substrate at known coordinates, align the design to those same coordinates in the editor, and print. For repeat jobs there's no photo, no 2-minute capture, no distortion, because there's no camera. The accuracy comes from the machine's motion system, the same one that puts ink where it's told to within a fraction of a millimeter.
The rule that falls out of it: camera for the middle of the bed, coordinates for the edges.
Zero Point Alignment has one honest requirement, and it's the reason jigs and this feature belong in the same sentence: coordinates position the print, but something physical has to position the parts. eufyMake's own guide says to place "the fixture or substrate" at the zero point. Eyeballing 42 coins onto imaginary grid lines defeats the purpose. A jig with a pocket for each part puts every piece in the same place every time: today, and next month when the order repeats.
From STL to jig in four steps
After enough full-bed jobs of my own went sideways at the edges, I made jigGenerator, a free browser tool that builds the jig and the matching Studio template from the STL of your part. No account, and your files never leave your device. The workflow:
- Drop the STL of the part you print on. Up to 3 different objects per jig, each with its own orientation, pocket shape and quantity.
- Pick the bed and the fit. E1 presets for the standard and mini flatbeds, silhouette or bounding-box pockets, clearance starting at 0.15 mm, automatic nesting that packs circles and hexes tighter.
- Drag to fine-tune. Move any piece in the preview and every export updates to match.
- Download what your workshop can make. DXF/SVG pocket-and-base sheets for a laser cutter, a one-piece printable STL for any FDM printer, and a bed-sized PNG or SVG placement template for eufyMake Studio with every position numbered.
The template is the piece that closes the loop: import it into Studio at bed size, drop your artwork on the numbered outlines, hide the template layer, and print with Zero Point Alignment. Register the jig against the same bed corner every time (the template's 0,0 mark is that corner). If an FDM-printed jig binds or sits slightly small, it shrank as it cooled; scaling it up about 0.3% brings the pockets back in line. Support for the xTool O1 Omni, HeyGears G1X and Morpho is listed as coming.
The catch
The camera-free workflow has its own costs, and they deserve stating plainly:
- Zero Point Alignment has a learning curve. "Zero point. I am so lost" is a real thread title, the manual offset entry is capped at 5 mm in each direction, and a June Studio update briefly shipped an SVG scaling bug that threw zero-point jobs off. Expect an evening of setup, not five minutes.
- You give up a little bed. In zero point mode the printable area shrinks by 2 mm in both length and width, substrates must stay under 100 mm tall, and the surface being printed has to sit within 2 mm of the part's highest point.
- A jig is a physical object. It costs a sheet of material or a few hours of FDM time, and a new part shape means a new jig. For one-off odd shapes, the camera (Assisted Shot for small, transparent or reflective pieces) is still the right tool.
- Your camera might be fine. At least one owner reports accurate snapshots even at the bed ends, and a recalibration fixed another's 3 mm offset entirely. Run a test grid across the bed before building fixtures; calibrate first, conclude second.
Verdict
For a centered one-off, use Snapshot and don't overthink it; that's the job the camera does well. The moment a layout touches the bed edges or a job will ever repeat, switch: Zero Point Alignment for position, a jig for repeatability, and the camera demoted to a preview. That's also what eufyMake's own printing guide recommends if you read it closely; they just don't ship the jig. If a future Studio update adds real distortion correction the camera closes some of the gap, but for batches the coordinate workflow stays faster regardless, because the fastest photo is the one you never take.
Frequently asked questions
Why are my eufyMake E1 prints misaligned?
Two faults share the symptom: a global offset of 1 to 3 mm that hits the whole bed equally (fix: run Camera Calibration, about 5 to 10 minutes; one owner cleared a 3 mm offset by recalibrating on plain card stock), and edge drift from lens distortion that calibration cannot remove. If the error grows toward the bed edges, stop positioning by photo and use Zero Point Alignment with a jig.
How accurate is the eufyMake E1's camera alignment?
eufyMake publishes no XY accuracy figure as of July 2026. Owner reports put it near-perfect at the bed center and 1 to 3 mm off toward the edges, varying by unit. eufyMake's own printing guide says the camera 'is most accurate' at the center and recommends a jig for edge work.
What is Zero Point Alignment on the eufyMake E1?
A positioning mode added to eufyMake Studio on March 4, 2026: calibrate the mat's zero point once, then place parts at known coordinates and print without the photo step. It raised the height limit from 60 mm to 100 mm, but the printable area shrinks by 2 mm in each direction and the print surface must sit within 2 mm of the substrate's highest point.
Do I need a laser cutter to make a jig for the E1?
No: jigGenerator exports the same jig 3 ways, DXF/SVG sheets for a laser, a one-piece STL any FDM printer can make, and a bed-sized PNG/SVG placement template for eufyMake Studio. If an FDM-printed jig sits slightly tight, scale it up about 0.3% to compensate for cooling shrinkage.
Will eufyMake fix the camera distortion in software?
Nothing is announced as of July 8, 2026. The Studio 3.8 roadmap names 'multi-element layout inefficiency' among the pain points it targets, and v4.0 improved the calibration workflow, but no distortion-correction feature is public. Even if one lands, coordinates plus a jig stay faster for repeat batches because they skip the capture step entirely.
Sources & methodology
- eufyMake E1 Photo Alignment user guide (Snapshot and Assisted Shot modes, recognition caveats)
- eufyMake, official UV printing guide (edge drift from lens distortion with a jig recommended, design-bleed advice, and a 1-3 mm snapshot height error with mats), '34 Essential UV Printing Tips', updated Jun 29, 2026
- eufyMake Zero Point Calibration and Zero Point Alignment guide (workflow, 100 mm height limit, 2 mm printable-area reduction)
- eufyMake Studio update announcement: Offline Use, Zero-Point Alignment, Mar 4, 2026
- eufyMake Camera Calibration guide (automatic, ~5-10 min, trigger: 'noticeable overall offset')
- eufyMake official store: E1 $2,499 / $3,299, ink $42.99 per 100 ml, EU price 2,499 EUR
- Reddit sweep: r/eufyMakeOfficial (1,597 posts, 6,200 comments) and r/UVprinting (317 posts, 1,200 comments), 13 alignment-relevant threads, quotes verbatim from archived comments
- Representative owner threads: snapshot camera distortion (golf balls), Jun 15, 2026
- Representative owner threads: artwork lining-up trouble and the switch to zero point, May 4, 2026
- FauxHammer, eufyMake E1 one year later (edge-of-frame distortion, zero point + jigs recommended)
- jigGenerator feature set (free, browser-based, STL to laser/FDM jig + Studio template), from the live app
Share this article
Related articles
Printers · Jul 4, 2026
The Best Desktop UV Printer in 2026: Every Machine Compared
Desktop UV printers now share the same desk, from $1,599 to $9,299. The field moved again this month: eufyMake cut its ink prices about 30%, and four challengers are heading for launch. Here is the whole sub-$10,000 field as of July 2026: what each machine prints, what the ink costs per liter, and which one fits which kind of work.
27 min read
Printers · Jun 12, 2026
HeyGears G1 and G1X: Full-Color 3D Printing Gets a Desktop Price
Full-color 3D printing used to mean a $50,000 machine. HeyGears put it on a desk for $3,299. The three tiers print very different things, and HeyGears has now published the ink, resin and printhead numbers that decide the real cost of ownership. Here's every price, what each pack buys, and what it costs to run.
18 min read
Printers · Aug 19, 2026
Creality's SPARKX i8 Puts Four Color Channels in One Toolhead
The SPARKX i8 runs four filament channels into a single toolhead and merges them 1.7 mm from the nozzle, which Creality says cuts a color change to under a second. It also says the machine saves 438 kg of filament over 3,000 color changes, and values that at about $1,500.
9 min read